Google maps and the International Space Station with Python part 2
In the previous article, I coded up a project which returned the location of the international space station and then pinned on location on a map. This was done by getting the international space station’s coordinates from an API. Then plotting those coordinates on google maps, using the google maps API.
Now this will be continuing the project by adding more features into the program. These features include returning the names of the astronauts that are in the international space station right now. And a web interface that will show the location of the ISS and the details of the astronauts in the ISS below the map.
Will start with the easiest task, which will be returning the names of astronauts in the ISS. This one of the easier tasks because the API we used previously to get the coordinates has another function to return names of the astronauts
Just like we used the requests library to extract the JSON file from API, we will do the same thing for returning information of the astronauts. This time the API is under astros.json.
r = requests.get('http://api.open-notify.org/astros.json')
result = r.json()
Now printing the extracted JSON gives us this:

As we can see the API successfully gave the JSON file to us. Now we want to extract it further so it returns the names and number astronauts in the ISS.
We access the section where the names are stored in the JSON file.
Austonuts_in_space = astronuts_names['people']
Then run a loop over the this level of the JSON file:
for person in Austonuts_in_space:
    print(person)
You get a result like this:
{'name': 'Alexey Ovchinin', 'craft': 'ISS'}
{'name': 'Nick Hague', 'craft': 'ISS'}
{'name': 'Christina Koch', 'craft': 'ISS'}
{'name': 'Alexander Skvortsov', 'craft': 'ISS'}
{'name': 'Luca Parmitano', 'craft': 'ISS'}
{'name': 'Andrew Morgan', 'craft': 'ISS'}
The next step is to get the names only. So just need to add the ‘name’ key next to the person variable in the loop
for person in Austonuts_in_space:
    print(person['name'])
Alexey Ovchinin
Nick Hague
Christina Koch
Alexander Skvortsov
Luca Parmitano
Andrew MorganNext is to print out the number of people in space. This is very simple as we just need to call the ‘number’ key and print it out.
number_in_space = astronauts_names['number']
print('Number of people in space:', number_in_space)
Number of people in space: 6
This is great now the can return the names of the astronauts and the number of people in the ISS. Now we want a way for the program to give extra information about the astronaut like a short biography.
To get info about people you don’t know is normally go the Wikipedia. (After google directed you there) So I want to code a way that the program searches information about them from Wikipedia or other sources. And prints out the information.
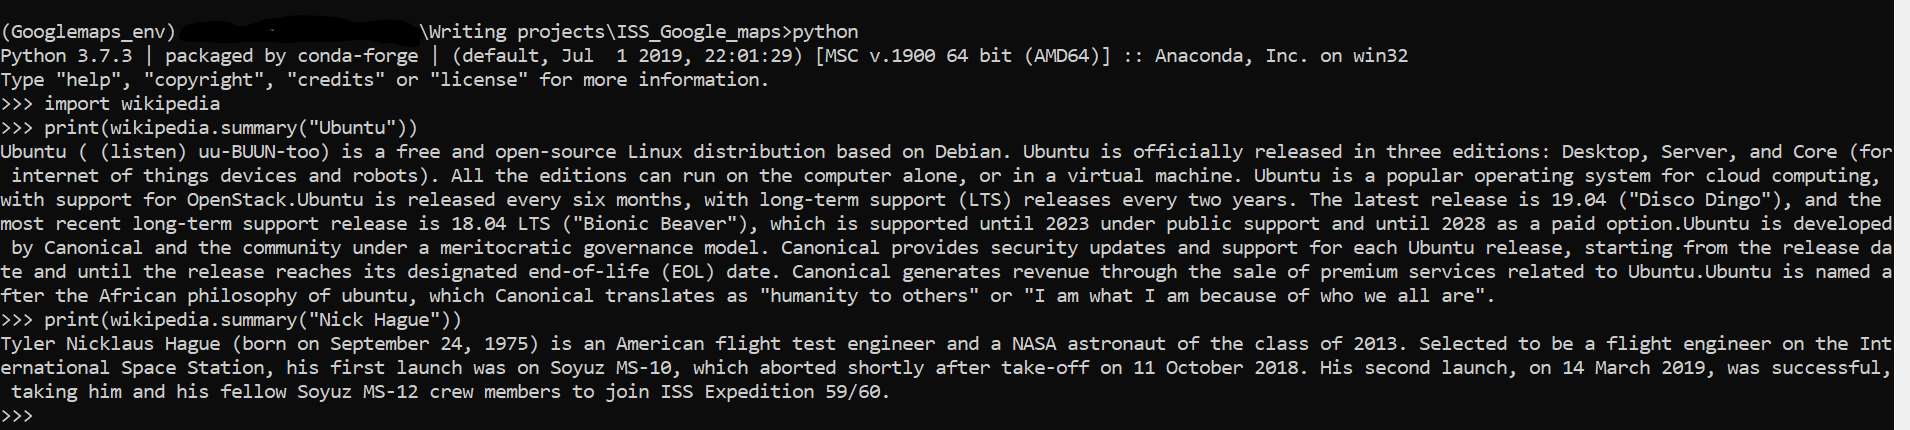
To start we need to install the Wikipedia API package. As I'm using the anaconda suite I used conda install. You can still use pip install. I’ve never used this package before I'm using this article to help me.
To test how the package worked, I opened up the console to run some function. Tried the example from the article above and my own example using the astronauts printed from earlier.
Now in the program, we need to way to feed the names into the Wikipedia function. So first we need to make a list of the names printed out earlier. This can be done by modifying the existing for loop to append the names to an empty list.
List_of_names = []

for person in astronauts_in_space:
    print(person['name'])
    List_of_names.append(person['name'])
['Alexey Ovchinin', 'Nick Hague', 'Christina Koch', 'Alexander Skvortsov', 'Luca Parmitano', 'Andrew Morgan']
Now we have the list of the astronauts' names we can then focus on coding up the Wikipedia function.
Using the code below is a for loop which iterates through the list of names we made earlier, prints a Wikipedia summary for the given value it has iterated through.
for every_person in List_of_names:
    print('-------------------------' * 3, end='\n')
    print(wikipedia.summary(every_person))
As we can see it is doing well but on the last name it threw an error:
wikipedia.exceptions.DisambiguationError: "Andrew Morgan" may refer to:
Andrew R. Morgan
Andrew Morgan (musician)
Andrew D. Morgan
Andrew Price Morgan
Andrew Morgan (cross-country skier)
Andrew Morgan (director)
This error happens when they are many articles under the same name. For now, I think I will hardcode a solution. As trying futureproof these type of error may be a bit difficult. To fix the issue I’ve added extra if statements in the for loop. So if it matches the string it will get the summary of the astronaut’s precise search.
for every_person in List_of_names:
    print('-------------------------' * 3, end='\n')

    if every_person == 'Andrew Morgan':
        every_person = 'Andrew R. Morgan'


    if every_person == 'Alexander Skvortsov':
        print('IF STATEMENT' * 5)
        every_person = 'Aleksandr Skvortsov (cosmonaut)'


    print(wikipedia.summary(every_person))
We can see the printed statements below:

Now I have the information about the cosmonauts. I want to move on to making the website.
I want to make the web interface with the flask library. As it lightweight and the website should not have too many features. When looking around I found that GitHub project that worked made dealing with flask and GoogleMaps easier. The project called Flask Google Maps the project made creating a template and a view for flask simpler. This is done by generating a google maps page with a flask template or using the package’s functions on a view to generate a map.
I opted to use the view method as its more clearer how to use.
@app.route("/")
def mapview():
    # creating a map in the view
    mymap = Map(
        identifier="view-side",
        lat=latitudefloat,
        lng=-longitudefloat,
        markers=[(latitudefloat, -longitudefloat)]
    )

    return render_template('home.html', mymap=mymap)
The code was based on the example code given in the readme. The longitude and latitude variables were imported from the previous script.
from main import longitudefloat, latitudefloat
This was the simple HTML page got:

The map was able to pin the location of the ISS and also have a simple heading. But later on, I noticed that generating a new map was not needed as I already generated one using my previous script. So decided to replace this newly generated map with my old one.
This was done by replacing the mapview function with only a pass statement. Which would only return the google maps HTML file.
def mapview():
    pass
    return render_template('my_map.html')
But the big issue popped out when the marker was not showing. After a few hours trying to fix the issue I found that i should just use my custom template based on the official google JavaScript API page for adding markers example code.
So now my webview function looks like this:
def mapview():
    latitude = latitudefloat
    longitude = longitudefloat
    return render_template('From_google.html', latitude=latitude, longitude=longitude)
The only code I’ve changed in the HTML file are the numbers defining location of the map to flask variables for the template. Later I change the code so it does say the location is Uluru. This was simple done to test out the code quickly without breaking the whole file.
function initMap() {
  // The location of Uluru
  var uluru = {lat: , lng: ;
  // The map, centered at Uluru
  var map = new google.maps.Map(
      document.getElementById('map'), {zoom: 4, center: uluru});
  // The marker, positioned at Uluru
var marker = new google.maps.Marker({position: uluru, map: map});
When running the flask local server this is the result:

This I would say it’s even better than the previous versions of the map. Mainly because the marker looks more modern.
Now the next steps are to develop the mini-biography sections below the map.